Moving text in Photoshop is a fundamental skill that allows users to create visually appealing designs and layouts. Whether you’re working on graphic design projects, creating social media posts, or designing website banners, knowing how to move text precisely is an essential technique.
In this guide, we will explore the step-by-step process of moving text in Photoshop. From selecting and editing the text to copying, pasting, and resizing it, we will cover all the necessary techniques to ensure you have full control over the placement of your text elements. By mastering this skill, you will be able to enhance the visual impact of your designs and create professional-looking compositions in Photoshop.
Key Takeaways
- Moving text in Photoshop is essential for creating visually appealing designs and layouts.
- Mastering the skill of moving text allows for precise control over the placement of text elements.
- Adding and placing text in Photoshop can be done using the Type Tool, Text Box tool, or by importing text.
- Selecting, editing, copying, pasting, resizing, and changing the color of text are important techniques in Photoshop.
Download Sample File and Fonts
To download the sample file and fonts for moving text in Photoshop, users can access them by following the provided link. This link will lead them to a webpage where they can find the necessary resources to practice and master the art of moving text in Photoshop.
The sample file will serve as a hands-on exercise, allowing users to experiment with different techniques and explore the various possibilities that moving text offers. The fonts provided will enable users to customize their text and create visually appealing designs.
Add or Place Text

Continuing from the previous subtopic, users can add or place text in Photoshop to further enhance their designs and manipulate the position of the text within the composition. Adding text allows users to incorporate important information, captions, or titles into their images while placing text gives them the flexibility to position it anywhere within the design Create A Mockup In Photoshop. Here are three ways to add or place text in Photoshop:
- Type Tool: Select the Type Tool from the toolbar, click on the canvas, and start typing your text. Adjust the font, size, colour, and other formatting options as desired.
- Text Box: Use the Text Box tool to draw a rectangular shape on the canvas. Then, type your text within the box and format it according to your preferences.
- Import Text: Import text from an external source by going to File > Place Embedded or File > Place Linked. Choose the text file and position it within the design.
Select Text
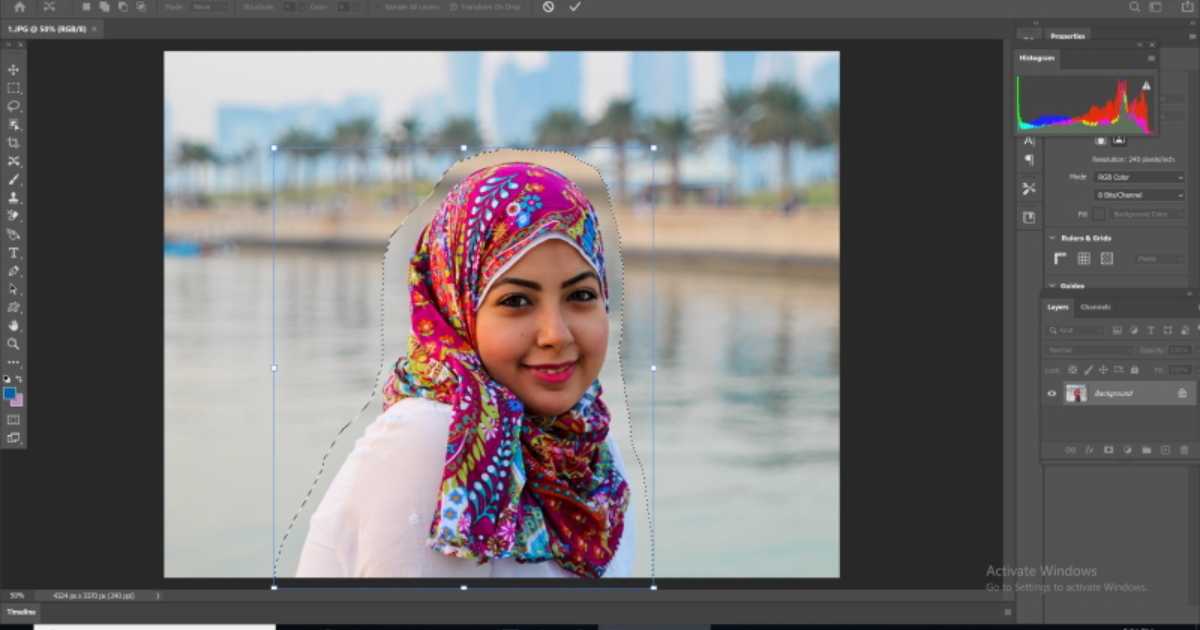
First, you need to select the text that you want to move in Photoshop. To do this, open the Photoshop document and select the Text tool from the toolbar. Then, click and drag your cursor over the text you want to move. This will create a selection around the text, indicating that it is now editable.
Once the text is selected, you can move it by clicking and dragging it to a new location within the document. It is important to note that you can only move text that is editable, so make sure to select the appropriate layer or text box before attempting to move it. Now that you have selected the text, let’s move on to the next step, which is editing the text itself.
Edit Text
Now that the text has been selected, it is time to edit it in Photoshop. Editing text in Photoshop allows you to make changes to the font, size, color, and other formatting options. Here are some steps to help you edit your text effectively:
- Double-click the text layer in the Layers panel to highlight the text and access the text editing options.
- Use the toolbar at the top of the screen to customize the font, size, and other formatting attributes.
- To make more advanced edits, such as adding effects or adjusting the spacing, go to the Character panel.
Copy and Paste the Text
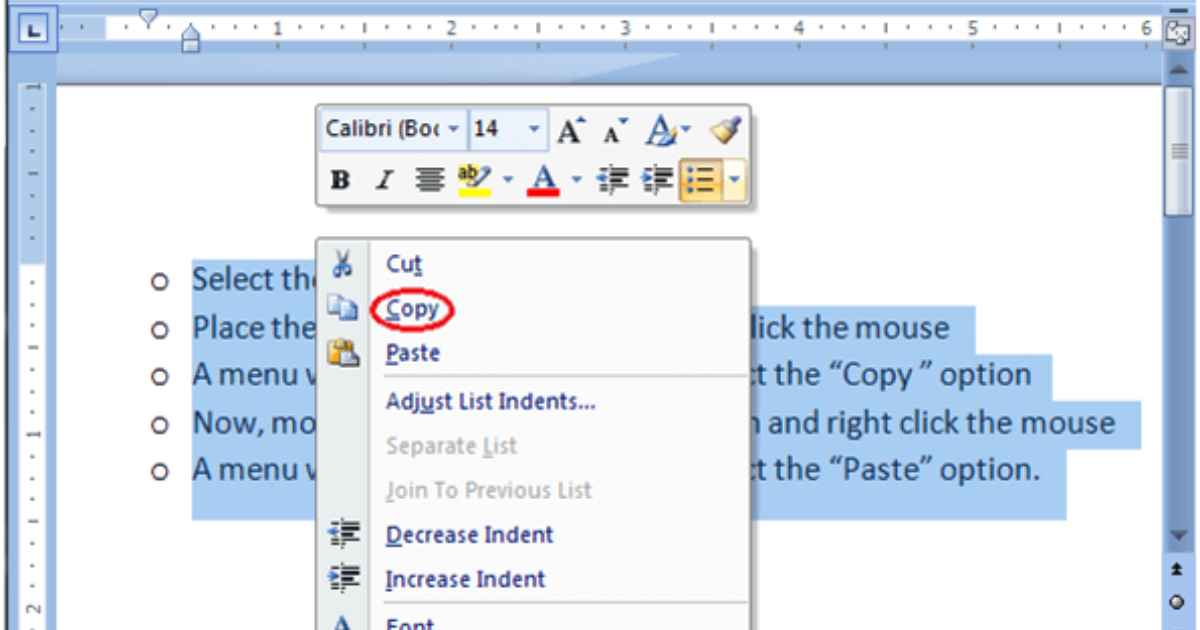
To copy and paste text in Photoshop, you will need to follow these steps. First, select the Move tool from the toolbar or press the V key on your keyboard. Next, click and drag over the text you want to copy to select it.
Then, right-click on the selected text and choose “Copy” from the context menu. After that, create a new text layer by clicking on the “T” icon in the toolbar or pressing the T key. Finally, right-click on the new text layer and select “Paste” from the context menu. The copied text will now be pasted onto the new layer.
Here is a table summarizing the steps to copy and paste text in Photoshop:
| Step | Description |
|---|---|
| 1 | Select the Move tool or press the V key |
| 2 | Click and drag over the text to select it |
| 3 | Right-click and choose “Copy” |
| 4 | Create a new text layer |
| 5 | Right-click on the new layer and choose “Paste” |
Resize Text
To resize text in Photoshop, you will need to adjust the font size using the text options in the toolbar. This allows you to make the text larger or smaller to fit your design. Here are three simple steps to resize text in Photoshop:
- Select the Move tool from the toolbar.
- Click on the text layer that you want to resize.
- In the options bar at the top of the screen, adjust the font size by either typing in a specific value or using the increase/decrease buttons.
Move Text
The movement of text in Photoshop can be achieved by utilizing the text layer’s positioning capabilities. By selecting the text layer and using the Move Tool, users can easily drag and drop the text to different positions within the canvas. The arrow keys on the keyboard can be used to nudge the text in small increments.
To ensure precise movement, the Info panel can be utilized to view the exact coordinates of the text layer. If you’re wondering How To Move Text In Photoshop? it is important to note that the movement of texts is non-destructive, meaning that it can be easily adjusted or repositioned at any time. This flexibility allows users to experiment with different layouts and designs until the desired result is achieved.
| Movement Method | Description | Shortcut Key |
|---|---|---|
| Drag and Drop | Click and hold the text layer, then move it to the desired position | N/A |
| Arrow Keys | Select the text layer and use the arrow keys on the keyboard to nudge the text | ↑ ↓ ← → |
| Info Panel | Select the text layer and view the exact coordinates in the Info panel | N/A |
Change the Color of the Text
To modify the colour of text in Photoshop, users can employ the ‘Change Color’ feature within the software. This feature allows users to easily change the colour of their text without having to recreate it or use additional tools. By following a few simple steps, users can transform the colour of their text to suit their needs.
Here are three steps to change the colour of the text in Photoshop:
- Select the text layer: Users need to choose the text layer they want to modify by clicking on it in the Layers panel.
- Access the ‘Change Color’ feature: Users can go to the top menu and navigate to Image > Adjustments > Change Color to open the ‘Change Color’ dialogue box.
- Adjust the colour settings: Within the ‘Change Color’ dialogue box, users can use the various sliders and options to modify the hue, saturation, and lightness of the text. They can also use the eyedropper tool to select a specific colour from the image.
FAQs
Conclusion
In conclusion, mastering the art of moving text in Photoshop can greatly enhance your design projects. By following the simple steps outlined in this article, you can effortlessly manipulate the position, size, and colour of text to create visually appealing compositions.
Remember, practice makes perfect, so don’t be afraid to experiment and unleash your creativity. As the saying goes, “A picture is worth a thousand words,” and with Photoshop, you can make those words truly impactful.