
Photography involves capturing images using a camera, employing light-sensitive materials or electronic sensors. It freezes moments, creating visual representations in various formats, from prints to digital images.
What Is A Stop In Photography? This intriguing question introduces the concept of a stop, a unit measuring changes in exposure settings. Masters of stops control light reaching the camera sensor, balancing brightness and darkness in their images.
Explore the Stop In Photography unveils a fundamental aspect of the craft. Stops represent doubling or halving light entering the camera, vital for managing exposure settings and achieving desired visual effects. Understanding stops is indispensable for photographers to refine their skills and create compelling images.
Why Does Understanding Stop Matter in Photography?
Understanding stops matters in photography because they determine the amount of light reaching the camera sensor. By grasping this concept, photographers gain control over exposure settings, enhancing the quality of their images. Adjusting stops allows photographers to manage brightness and darkness, ensuring well-balanced and visually appealing photos.
In simple terms, stops influence key elements like aperture, shutter speed, and ISO, impacting the overall look of a photograph. Knowing how stops work empowers photographers to make informed decisions, capturing moments with precision and achieving the desired visual effects. Mastery of stops is fundamental for any photographer aiming to elevate their skills and produce
impactful images.
What Are the Key Elements of a Stop in Photography?
In photography, a stop is a crucial element that helps control exposure settings. Think of it like a building block for your pictures. It mainly involves adjusting three key elements: aperture, shutter speed, and ISO, allowing you to manage how much light hits your camera’s sensor.
The aperture stop regulates the size of the opening in your camera’s lens. A wider aperture lets in more light, perfect for low-light situations, while a narrower one does the opposite. Secondly, the shutter speed stop determines how long your camera’s shutter stays open. Faster speeds freeze action, and slower speeds capture motion.
How Does Aperture Impact Stops in Photography?
The aperture in photography is like the eye of the camera. It’s the opening through which light enters. When we talk about stops in photography, changing the aperture affects the amount of light hitting the camera sensor. A wider aperture (lower f-number) lets in more light, while a narrower aperture (higher f-number) reduces the light.
This adjustment is crucial because it helps control exposure and depth of field, giving photographers creative freedom in capturing well-lit and focused shots. Understanding how aperture impacts stops is essential for photographers.
A Crucial Relationship in Photography
In photography, the relationship between shutter speed and stops is crucial. Shutter speed determines how long the camera’s shutter stays open and stops help control the amount of light hitting the camera sensor. You can also print and sell your photographs.
When adjusting shutter speed, understanding stops is essential for achieving the right exposure, whether freezing fast action with a quick shutter or capturing more light in low-light conditions with a slower one.
Think of stops as building blocks for exposure adjustments. If you increase the shutter speed by one stop, you’re letting in half the amount of light. Conversely, decreasing it by one stop allows twice as much light. This relationship is like a dance, where adjusting one element impacts the other.
ISO Settings Unveile to Navigate Stops in Photography
Understanding ISO settings is like having a superpower in photography. ISO measures the sensitivity of your camera’s sensor to light. As you increase the ISO, you make your camera more receptive to light, which is handy in low-light situations. But beware, cranking up the ISO too high can introduce graininess or noise to your photos.
Now, let’s talk about stops in photography. A stop is like a magical unit that controls the exposure of your photo. When you adjust your ISO settings, you’re essentially playing with these stops, balancing the brightness and darkness in your image.
How Stops Enhance Photography Skills
Understanding stops is like holding the reins in photography it’s the key to mastering exposure. Think of stops as units of light measurement, allowing you to control brightness and darkness in your photos effortlessly. Adjusting stops in your camera settings lets you fine-tune exposure, giving your photography skills a significant boost.
In the world of photography, stops are your allies in capturing the perfect shot. They empower you to navigate through different lighting conditions, making your images stand out. As you grasp the art of stops, you’ll find yourself confidently enhancing the visual appeal of your photographs, one perfectly exposed image at a time.
What Happens When You Adjust Stops in Low-Light Photography?
Adjusting stops in low-light photography impacts the overall exposure of your image. When you increase the stops, more light enters the camera, brightening the photo. This helps in capturing details in darker environments, reducing the risk of underexposure.
Conversely, decreasing stops in low-light conditions reduces the amount of light hitting the camera sensor. This can create a moodier atmosphere and prevent overexposure, maintaining the integrity of shadows and highlights. Understanding how stops work in low-light situations empowers photographers to adapt and achieve the desired balance for captivating and well-exposed images.
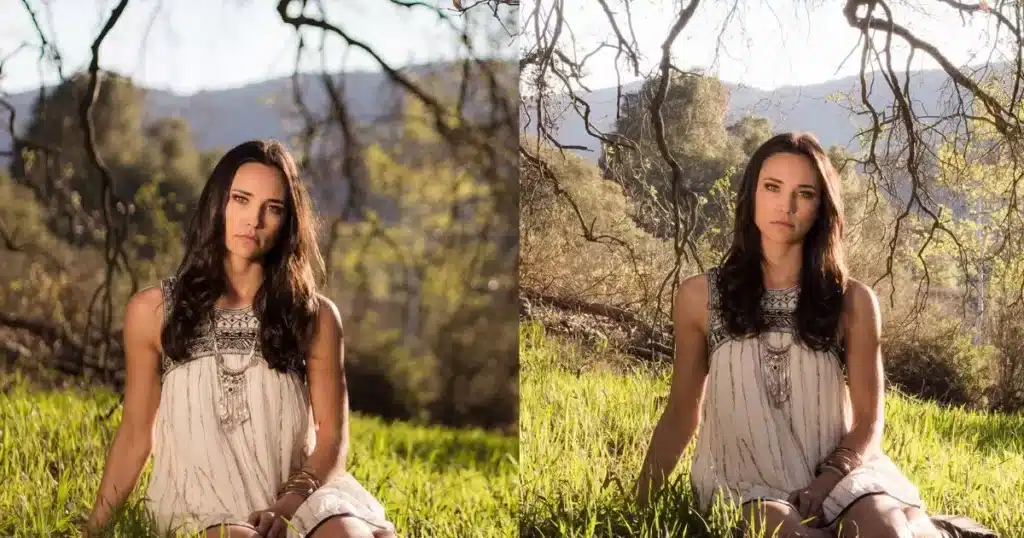
Overexposure vs. Underexposure to Find the Right Stops in Photography
In photography, achieving the right exposure is a delicate balance, and understanding stops is key to finding that equilibrium. Overexposure occurs when too much light reaches the camera sensor, resulting in a washed-out image with a loss of detail.
On the other hand, underexposure happens when insufficient light reaches the sensor, leading to dark and shadowed images lacking in clarity. The table below provides a quick reference guide to help photographers navigate and find the optimal stops for avoiding overexposure and underexposure in various lighting conditions.
| Lighting Conditions | Recommended Stops for Avoiding Overexposure | Recommended Stops for Avoiding Underexposure |
| Bright sunlight | Decrease stops | Increase stops |
| Low-light indoors | Increase stops | Decrease stops |
| Backlit subjects | Decrease stops | Increase stops |
| High-contrast scenes | Decrease stops | Increase stops |
Understanding the interplay of stops in different lighting situations empowers photographers to make informed decisions, ensuring well-exposed photographs with balanced highlights and shadows.
Stops’ Influence on Photography Aesthetics
In photography, mastering the art of composition is crucial. Stops, which control the amount of light in a photo, play a key role in shaping the visual appeal of your images. Adjusting stops allows you to create a balanced and aesthetically pleasing composition, ensuring your subject stands out with the right exposure.
When you understand how stops influence photography aesthetics, you can enhance your composition skills. Experimenting with stops empowers you to highlight details, control shadows, and bring out vibrant colors. The artful use of stops transforms a simple image into a visually engaging and well-composed photograph.
Common Challenges in Understanding Stops for Beginner Photographers
Beginner photographers often face challenges in grasping the concept of stops in photography. One common struggle is comprehending the impact of stops on exposure settings. Deciphering how changes in aperture, shutter speed, or ISO relate to stops can initially seem perplexing, but it’s a crucial step in mastering photography basics.
It’s common for beginners to encounter moments of frustration, but with time and hands-on experience, understanding stops becomes a valuable skill in the journey toward becoming a proficient photographer.
How to Experiment and Learn with Stops in Photography
Experimenting with stops in photography is a hands-on journey to understand exposure settings. Start by adjusting the aperture, a crucial element influencing stops. Wider apertures allow more light, while narrower ones reduce it—observe the impact on your images.
Explore shutter speed variations next. Faster speeds freeze motion, while slower ones create a sense of motion blur. Adjusting ISO adds another layer to experimentation—higher values amplify sensitivity to light. By actively tweaking these settings, you’ll develop an intuitive sense of stops, empowering your photographic skills.
FAQ’s
What Is A Stop In Photography?
A stop in photography is a unit of measurement used to quantify changes in exposure settings, impacting the amount of light reaching the camera sensor.
How do stops impact the aperture in photography?
Adjusting stops alters the aperture, controlling the amount of light entering the camera.
What role does shutter speed play in relation to stops?
Shutter speed, influenced by stops, determines how long the camera’s shutter remains open, affecting exposure.
How do ISO settings relate to stops in photography?
ISO settings, tied to stops, influence the camera’s sensitivity to light, crucial for managing exposure.
Conclusion
Mastering stops in photography empowers you to take control of your images. Adjusting stops allows you to manage light, creating well-balanced and visually compelling photographs. By understanding the impact of What Is A Stop In Photography? on aperture, shutter speed, and ISO settings.
Incorporating stops into your photography toolkit is a practical skill that can elevate your work. Experimenting with different stops enables you to navigate challenging lighting conditions and express your artistic vision effectively.