Photographers have an essential tool at their disposal for controlling exposure: ISO. This setting, which refers to the light sensitivity of the camera sensor, allows photographers to adjust how bright or dark their images turn out. While ISO introduces creative possibilities, it also comes with tradeoffs.
Finding the ideal ISO setting requires balancing noise reduction, dynamic range, motion freezing, and other factors. Through manipulating this single variable, photographers can masterfully shape their images to match their artistic vision.
This article delves into the nuances of ISO, from its technical meaning to practical usage advice. For any photographer looking to move beyond just pointing and shooting, an in-depth understanding of ISO is invaluable. Whether shooting a dimly-lit wedding, a fast-moving sports game, or a night landscape under the stars, ISO manipulation can make the difference between a blurry, grainy mess and a crisp, clean masterpiece.
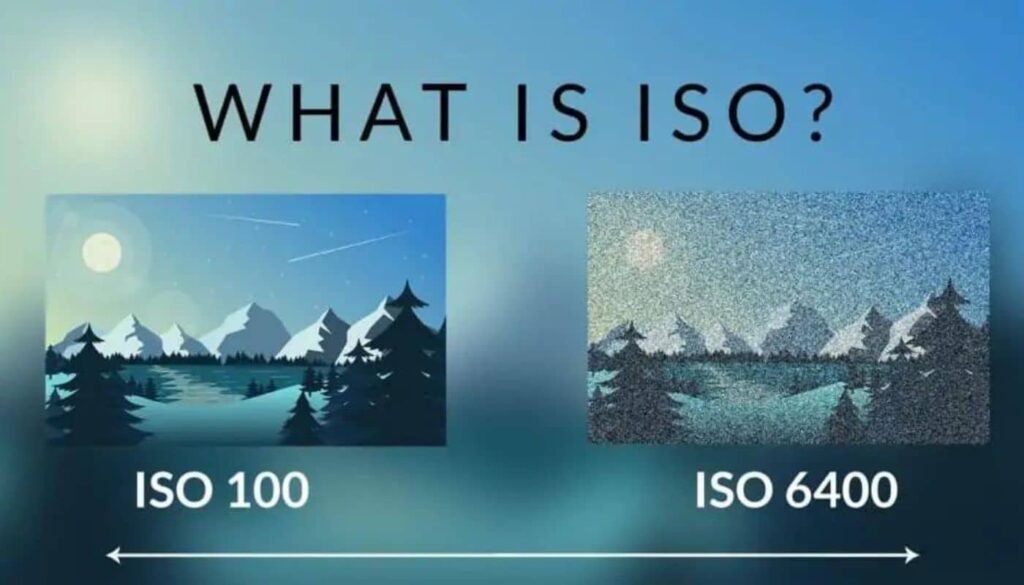
What is ISO?
The International Organization for Standardization – often abbreviated as ISO – acts as a beacon, illuminating pathways for organizations to tread upon in achieving harmonized benchmarks recognized globally. In its essence, ISO resembles a photographic tool, akin to adjusting a camera’s ISO setting to either amplify or dim the luminance of a captured moment.
Elevating the ISO index enhances luminosity, aiding in capturing scenes amidst dimly lit surroundings or providing latitude in adjusting aperture and shutter speed configurations. Nevertheless, the elevation of ISO is not devoid of repercussions; it engenders a grainy texture, termed noise, impairing image fidelity. Thus, tweaking ISO necessitates judicious consideration, warranting utilization only when alternative adjustments prove infeasible, ensuring image integrity.
What is the Meaning of ISO?
The acronym ISO stands for “International Organization for Standardization”. However, camera ISO does not directly refer to the organization that creates various technology and product standards. Ever since two film standards called ASA and DIN were combined into ISO standards in 1974 (later revised for both film and digital photography), they were referred to as one word “ISO” from that point on. Although ISO initially defined only film sensitivity, it was later adopted by digital camera manufacturers with the purpose of maintaining similar brightness levels as film.
What is Base ISO?
The lowest native ISO on your camera is your “base ISO”. This is a very important setting, because it gives you the potential to produce the highest image quality, minimizing the visibility of noise as much as possible. Some older DSLRs and a number of modern cameras, such as the Fuji X-T2 have a base ISO of 200, whereas most modern digital cameras have a base ISO of 100. Optimally, you should always try to stick to the base ISO to get the highest image quality. However, it is not always possible to do so, especially when working in low-light conditions.
What is ISO in Photography?
ISO settings on a camera affect how sensitive the film — or image sensor in digital photography — is to light. The higher the ISO, the more sensitive it is and the brighter your photos will be.
In low light situations, it is often necessary to raise the ISO in order to get a clear picture. The big problem with raising the ISO, though, is that it introduces “noise” into the image (we talk about this more below), which can make it appear grainy.
If you are taking a picture in ideal light conditions, you will want to keep the ISO low in order to avoid introducing noise into the image.
Generally speaking, though, you’ll want to experiment with different ISO settings to see what gives you the best results in different lighting conditions.
In case you’re curious, ISO stands for International Organization for Standardization.
Looking for great examples of photography? Check out our roundup of excellent photo essays.
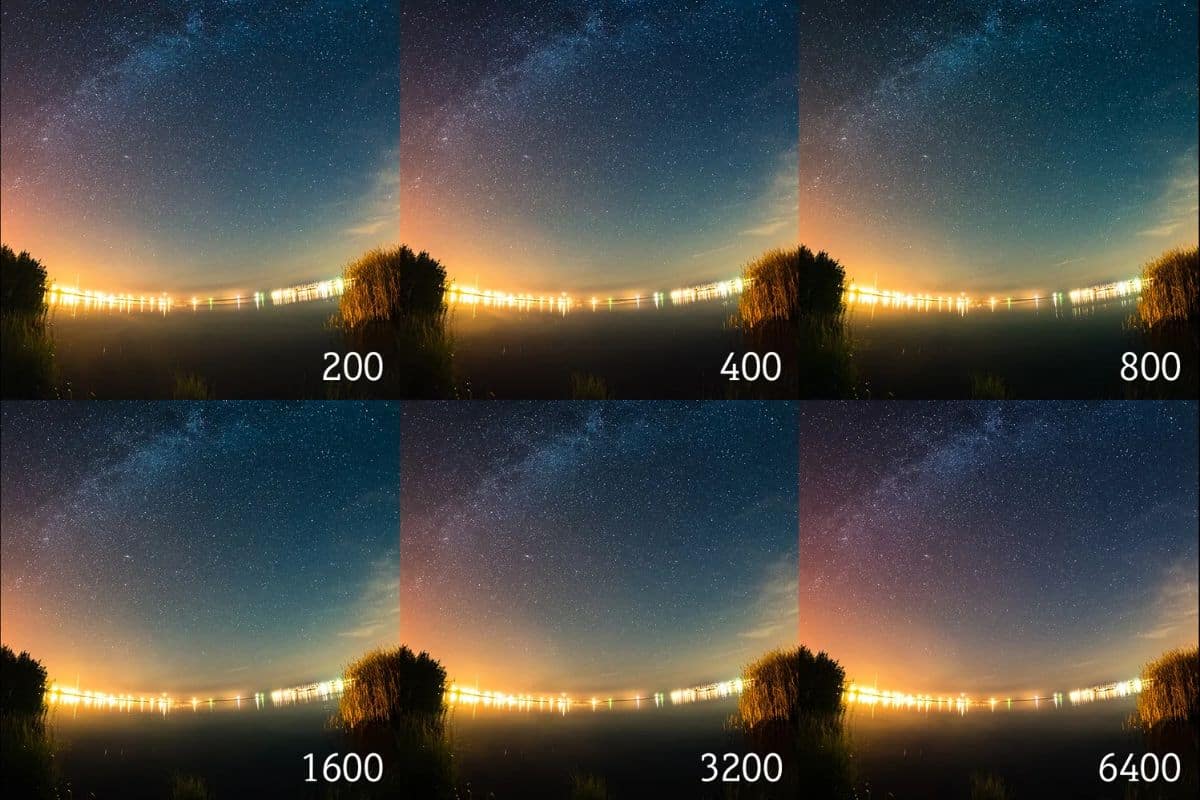
Common ISO Values
Every camera has a different range of ISO values (sometimes called ISO speeds) that you can use. A common set is as follows:
- ISO 100 (low ISO)
- ISO 200
- ISO 400
- ISO 800
- ISO 1600
- ISO 3200
- ISO 6400 (high ISO)
Quite simply, when you double your ISO speed, you are doubling the brightness of the photo. So, a photo at ISO 400 will be twice brighter than ISO 200, which will be twice brighter than ISO 100.
Adjusting your ISO settings.
The ideal ISO number allows your camera to achieve good image quality by letting the right amount of light hit the image sensor. In brighter lighting, lower ISO is best — low ISO values are better in well-lit scenarios. Conversely, when less light is available, you need a higher ISO to compensate. High ISO increases your camera’s light sensitivity, which is ideal for low-light situations.
Selecting the right ISO.
Here are a few general rules for finding the right sensitivity level for your DSLR or mirrorless camera’s digital sensor.
ISO 100:
This is the best choice for shooting outdoors on sunny days — the brightest situation you’ll likely be shooting in.
ISO 400:
When the lighting is still good, but less intense — like indoors by a window or outside on a cloudy day — a slightly higher ISO is ideal.
ISO 800:
If you’re shooting indoors without an additional light source like a flash, you’ll be working in this range.
ISO 1600:
When it’s dark out, or if you’re shooting indoors with dim lighting, you’ll need a high ISO. If movement is involved, you’ll want to pair that high ISO with a fast shutter speed as well.
“When the sun is bright outdoors, I barely adjust ISO,” photographer Ivy Chen says. “But when the sun is setting or I’m shooting inside and light conditions change, I’ll start upping my ISO to keep my photos properly exposed.” And while this guide gives you a good start, understanding ISO will be greatly informed by how you adapt while shooting.
When to Use Low ISO?

When you are taking pictures in good lighting conditions, you should use low ISO to avoid noise in the image. This will give you the best quality picture. That’s because a high ISO can lead to noise in your photos, which can be especially visible in dark or low-light situations. Noise can give your photos a grainy appearance and make them look less sharp.
Another thing to consider when choosing an ISO setting is the type of photo you’re taking. If you’re shooting a landscape or other static subject, you can afford to use a lower ISO.
To sum up, the main reasons to use a low ISO are:
Increased dynamic range
When shooting at low ISOs, you can often capture a wider range of tones and colors in your images, resulting in more dynamic and realistic photos.
Greater sharpness and detail
Low ISO images often have greater sharpness and detail than high ISO images, due to the reduced amount of noise present in the photo.
Lower noise levels
Noise is more pronounced at high ISO settings, so by using a low ISO you can keep noise levels to a minimum and produce cleaner images.
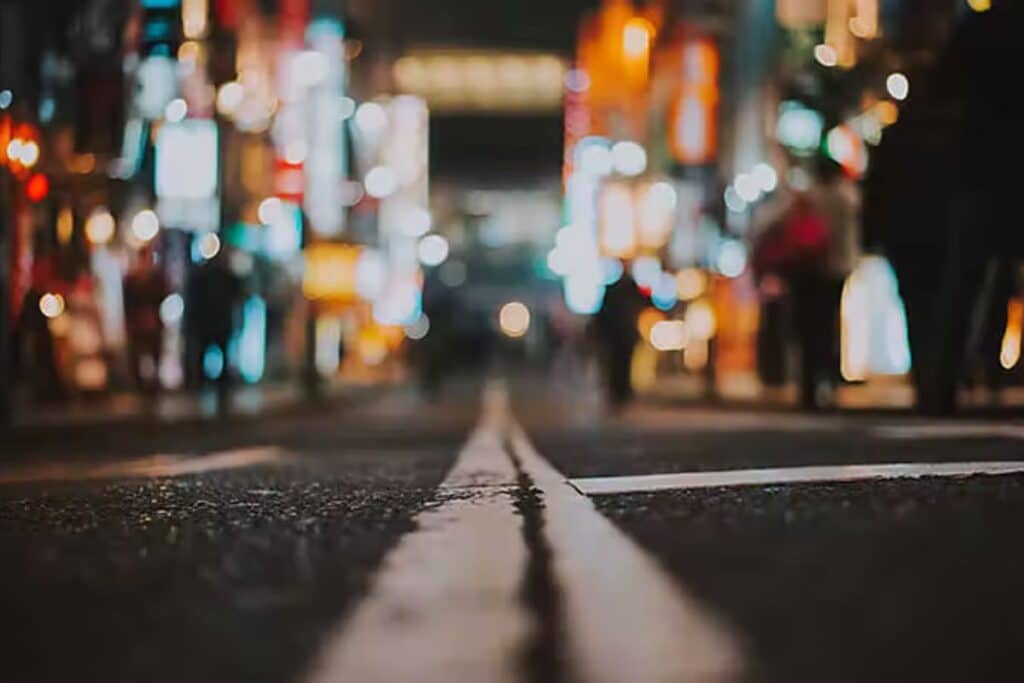
When to Use High ISO
High ISO should be used when light levels are low or when a fast shutter speed is needed. Because high ISO increases the sensitivity of the sensor, it allows for shorter exposure times. This is ideal in low light situations, as it reduces the chances of blurriness due to camera shake.
Fast shutter speeds are also important for capturing action without blurring, making high ISO ideal for sports and wildlife photography. Of course, there are also drawbacks to using high ISO. The increased sensitivity can result in more graininess and noise in the image, so it is important to experiment with different settings to find the balance that works best for you.
However, if you’re shooting a moving subject, like a child playing or birds in flight, you’ll need to use a higher ISO to freeze the action.
To sum up, the main reasons to use high ISO are:
Low light photography
ISO can be increased to make the camera more sensitive to light in low-light situations, resulting in a brighter image.
Reducing camera shake
When shooting in low light or with a long exposure time, increasing the ISO will help to reduce camera shake and create a sharper image.
Capturing action shots in low light
If you need to shoot action shots in low light, increasing the ISO can help you achieve a faster shutter speed that will freeze the motion of your subject.
Understanding ISO and ‘noise’
In photography, noise refers to the random variation of brightness or colour values within an image. It can be caused by a variety of factors, such as heat, electrical interference, or camera sensor defects. Noisy images often appear grainy or blurry, and can be difficult to print or enlarge without losing quality.
Although noise is generally considered to be undesirable, some photographers intentionally introduce it into their images for artistic effect.
When used sparingly, noise can add texture and depth, giving an image an organic, vintage feel. In recent years, digital noise reduction techniques have made it possible to significantly reduce noise levels in digital photographs. However, even with these advances, noise remains a common issue that all photographers must contend with.
How is ISO measured?
ISO is measured in numbers, with lower numbers being less sensitive and higher numbers being more sensitive. The most common ISO values are 100, 200, 400, 800, 1600, and 3000.
The lowest ISO setting or base ISO is typically 100, although some cameras go as low as 50 or even 25. Some older cameras will start at ISO 200.
Photography tips for ISO.
Your camera can be a great educational tool for learning ISO. “Set the camera to auto ISO and look back at your work to see what ISO was recorded,” photographer Stephen Klise suggests. “It will help you understand the relationship between real-life situations and ISO.”
While graininess is sometimes used as an artistic effect in photography, lower ISO values will give you less noise or grain on your final image, which is typically ideal. “You want your ISO to be as low as possible while still freezing the action, even if you want some grain for stylistic reasons,” photographer Derek Boyd explains. “The lower the ISO, the more detailed the photo.”
But just because your camera can shoot at ISO 50 doesn’t mean you should do that all the time — experiment to select the ISO for each situation that achieves the level of clarity or grain you want. While a stationary subject and use of a tripod can help capture clear, low-noise photos in a dark setting, when shooting handheld with low light, increasing shutter speed with high ISOs can help reduce digital noise if you want less grain. In well-lit scenes, you can close your aperture down a bit more to increase clarity in your photo.
Experience will be your best teacher, but you can learn more about shooting in different situations from professional photographers. Check out a few of these specialized scenarios below.
ISO and exposure: using ISO the right way
Newcomers often ask how to use ISO correctly. Generally speaking, using a lower ISO setting at shooting always produces better photos. We recommend using not more than 800 in low-light conditions and 100 in well-lit conditions, whenever possible. Using the lowest setting would result in a more detailed photograph that yields the highest image quality.
Many photographers take photos with the camera’s base ISO of 100 or even 200 in low-light conditions. They use a tripod to balance the time it would take for the camera to capture the image and correct exposure. However, these photos with the lowest ISO are only taken for landscapes. These settings shouldn’t be applied to portraits as you would just frustrate the subject. In this case, you should use a higher ISO.
What if you want to capture something in the dark and increase the ISO numbers (above 800)? In this case, it is advisable to sacrifice image quality to take that shot. High ISO will only result in much more noise.
General tips on how to improve image quality:
- Select the aperture value that allows you to achieve the desired depth of field.
- Choose a base ISO (the lowest possible) and set the shutter speed to whatever setting provides the correct exposure.
- If the object is blurry, gradually increase the speed and use a shorter shutter speed. Continue until a clear image appears.
It’s very simple! By following these recommendations, you will make the best image possible.
Wedding photography
With events that often require shooting in bright outdoor light and dim indoor settings within just a few hours, understanding how to adapt your ISO to new lighting is essential.
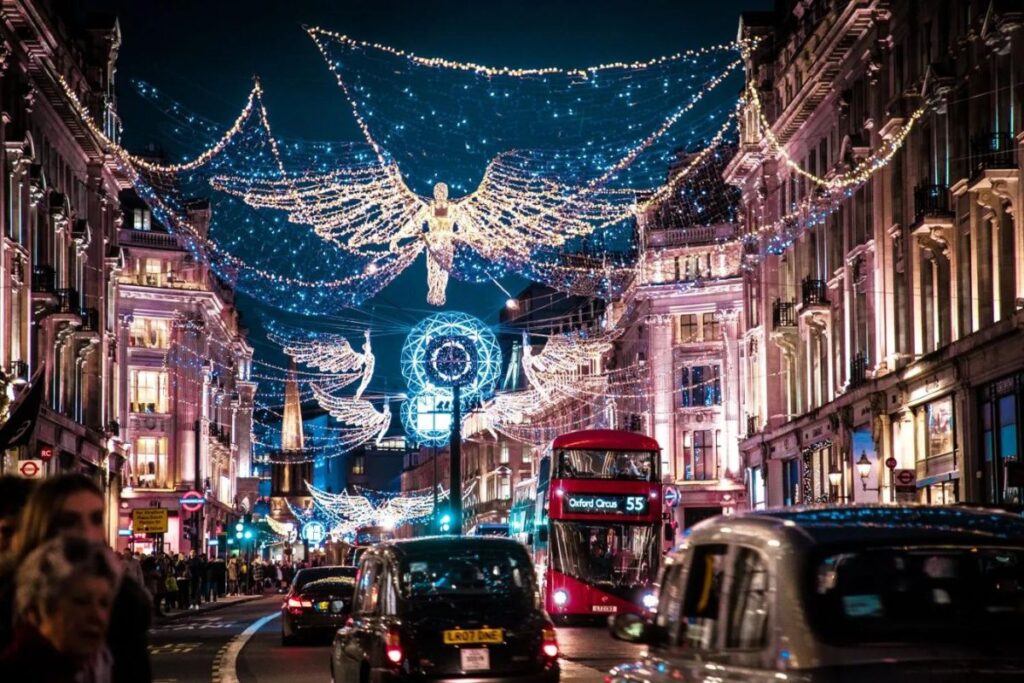
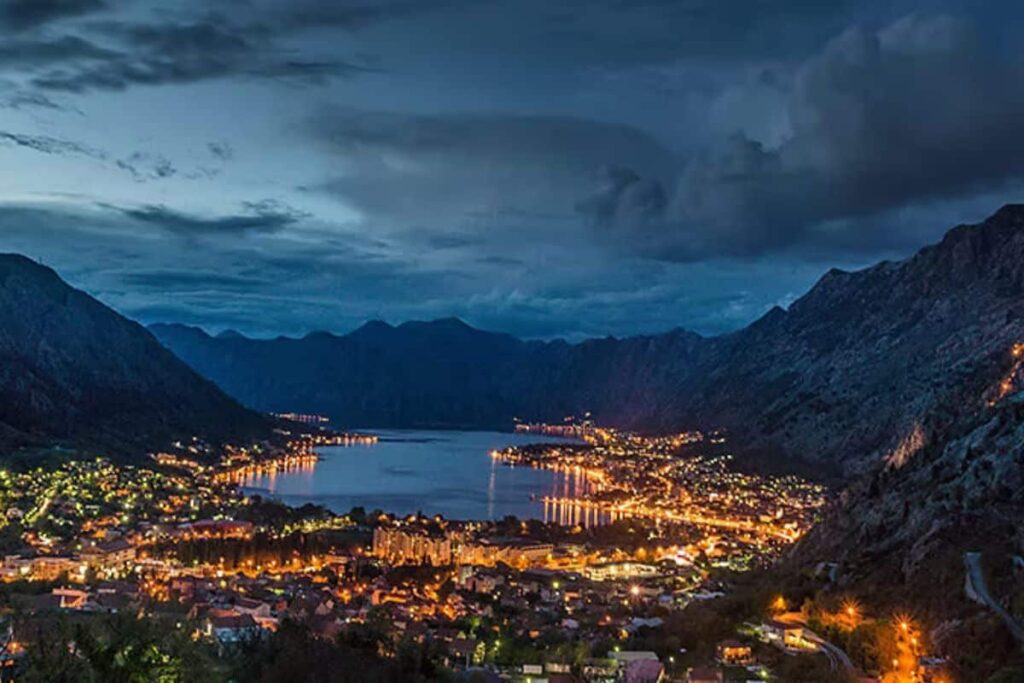
Night photography
Discover the challenges of capturing good photos at night and how a mastery of your camera’s settings can help.
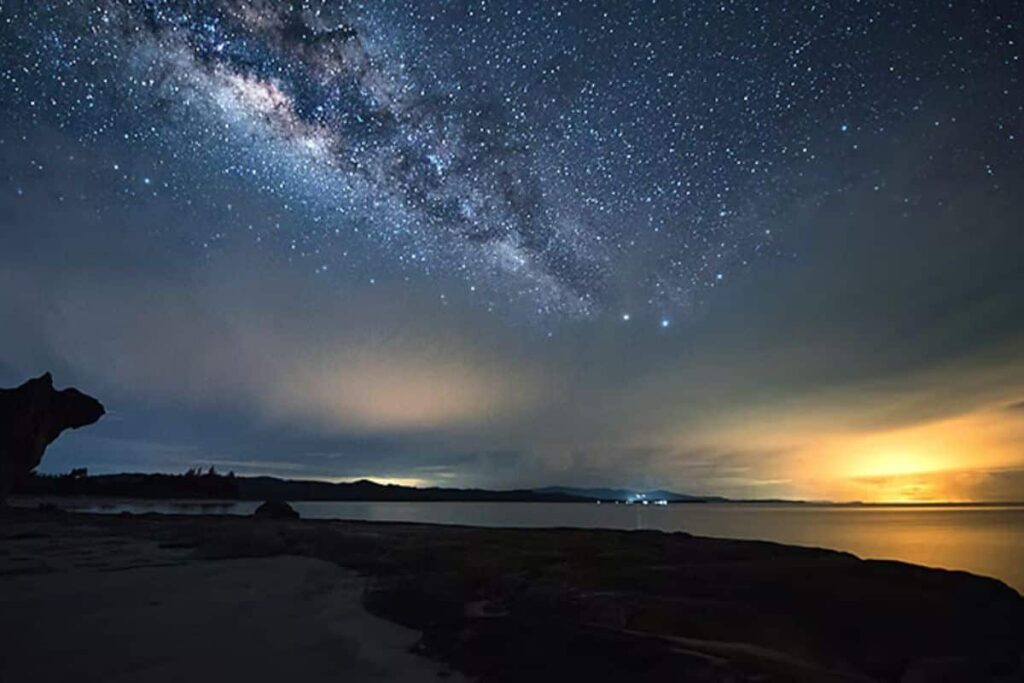
Astrophotography
If you want to shoot photos of the night sky, a high ISO setting is essential. Learn more about photographing the stars with the right equipment and camera settings.
What’s the difference between ISO, Shutter speed, and aperture?
You might have heard of the “holy trinity” of photography: ISO, shutter speed, and aperture. But what exactly do these three things mean? And how do they relate to one another?
ISO
As mentioned above, ISO refers to the sensitivity of your camera’s sensor. The lower the ISO number, the less sensitive it is; the higher the number, the more sensitive. But what about shutter speed and aperture?
Shutter Speed
Shutter speed is exactly what it sounds like: it’s the amount of time that your camera’s shutter is open while it takes a photo. A fast shutter speed (e.g., 1/250th of a second) is good for capturing moving subjects without blurring; a slow shutter speed (e.g., 1 second) is better for low-light situations or when you want to create a sense of movement in your photo (think: light streaks from car headlights), and don’t mind ‘motion blur’.
Aperture
Aperture refers to how wide your camera’s diaphragm opens while taking a photo. A wider aperture (e.g., f/2.8) means more light can enter—which is good for low-light situations—but it also has the effect of blurring the background of your photo while keeping the foreground in focus (a phenomenon known as “depth of field”). Conversely, a narrower aperture (e.g., f/16) keeps both the foreground and background in focus but doesn’t let in as much light—so it’s better for well-lit scenes.
FAQ’s
What does ISO mean in photography?
ISO is your camera’s sensitivity to light as it pertains to either film or a digital sensor. A lower ISO value means less sensitivity to light, while a higher ISO means more sensitivity.
What is a good ISO for photography?
Low values, such as ISO 100, are best for a sunny outdoor shoot. For shooting at night — or indoors with dim lighting — use an ISO of 1600 or higher. Keep the ISO setting as low as possible to minimize graininess and noise. If movement is involved, you’ll need to pair a high ISO with a fast shutter speed.
What is the difference between ISO and aperture?
Aperture: How big the opening is that lets light in, expressed in F-stops. The larger the number, the smaller the opening.
ISO: How sensitive your camera’s sensor is to light. The higher the ISO number, the more sensitive to light.
What ISO is too high?
Raising the ISO is one of the most common photographic fears. Photographers – especially beginners – are afraid to boost the ISO past 400 or so, lest they ruin images with ugly, unwanted noise. Ten years ago, these fears were justified. Raising your ISO to 1600 or 3200 was a no-go for the majority of cameras.
Which ISO is best for low-light?
To take great indoor photos in low-light conditions, you need to set your aperture to f/1.8 or f/1.4. In addition, kick the ISO to at least 800 with a faster shutter speed.
Conclusion
ISO is a crucial yet complex photographic tool. While higher ISOs brighten dim scenes, they also amplify undesirable noise. Meanwhile, lower ISOs produce clean, sharp images in bright light but falter in darkness. There are always tradeoffs to weigh. Through thoughtful ISO adjustments, photographers can capture stunning photos in practically any lighting conditions. However, success requires balancing noise reduction, motion freezing, dynamic range, and other factors unique to each shot. With experience, photographers develop an intuitive sense for optimal ISO settings. For any shooting scenario, the ideal ISO adapts the camera sensor to fit the artistic vision. Whether freezing action, capturing nightscapes, or keeping a dim wedding reception crisp, proper ISO technique makes the difference between mediocre snapshots and photographic mastery.