Astrophotography captures images of celestial objects, like stars, planets, and galaxies, using specialized cameras. It’s a way to document the night sky’s wonders and beauty through photography.
The secret lies in unlocking the full potential of those mesmerizing shots. Ever gazed up at the stars and wondered, how to edit astrophotography? Editing astrophotos involves enhancing details, reducing noise, and bringing out the vividness of space’s marvels.
Editing astrophotography involves specialized techniques tailored for celestial imagery. From adjusting contrast and brightness to managing color balance and reducing noise, these edits highlight the intricate details of stars, galaxies, and nebulae.
Understanding Raw Astrophotography Images
Raw astrophotography images are the untouched captures straight from your camera, containing a wealth of celestial information. These files hold immense detail and data, capturing the unfiltered essence of stars, galaxies, and nebulae. Processed JPEGs, and raw files offer flexibility for editing, preserving the nuances of light, colors, and shadows.
Within raw astrophotography images, you’ll find a treasure trove of data, encompassing the varying brightness levels of celestial objects. These files involve comprehending the intricate details within the dynamic range, from the faintest stars to the brightest celestial bodies.
Essential Tools and Software for Editing
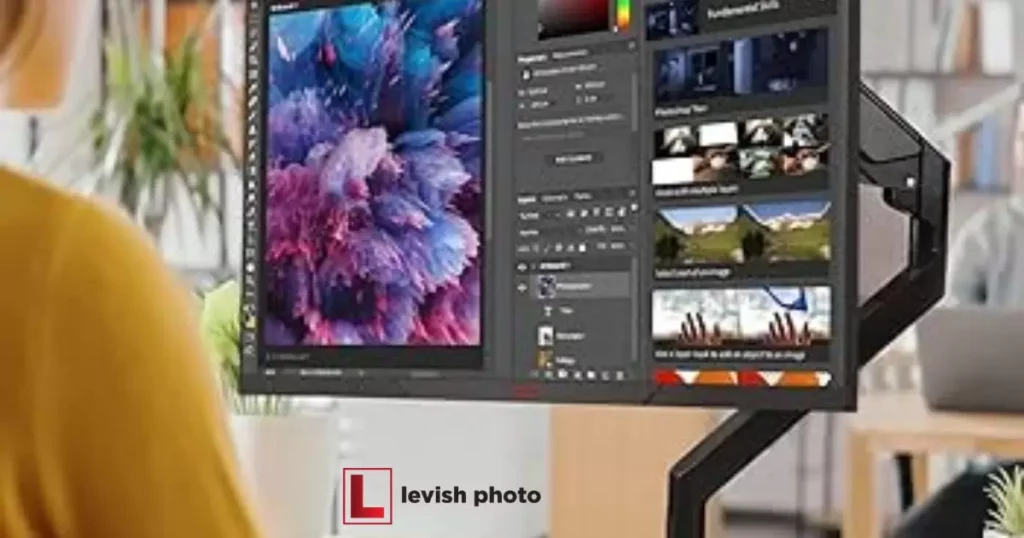
Editing astrophotography requires specialized tools and software tailored for handling raw astronomical images. Programs like Adobe Photoshop, and Lightroom, or specialized astrophotography software such as PixInsight or DeepSkyStacker are essential. They offer unique features designed specifically for handling the complexities of astrophotography data.
Astrophotographers often utilize dedicated astronomy software for stacking multiple images, aligning frames, and reducing noise. Tools like RegiStax or Sequator assist in processing and aligning multiple exposures to create a final, refined image.
Preparing for Editing By Organizing Your Workflow
Organizing your workflow before diving into astrophotography editing is crucial for a seamless and efficient process. Begin by transferring your raw images from your camera to a designated folder on your computer. Create a clear naming system to easily identify different celestial objects or locations.
Using dedicated software or applications that allow for easy file management and editing. Adobe Lightroom or specialized astrophotography software can assist in cataloging and organizing your images. Creating backups of your original raw files ensures their safety before making any edits.
Basic Editing Techniques for Astrophotography
Basic editing techniques serve as the foundation for enhancing your astrophotography. Begin by adjusting exposure to reveal details in the stars and celestial bodies. Increasing brightness without overexposing allows faint details to emerge. Contrast adjustments can help in emphasizing the differences between light and dark areas.
Tweaking the white balance ensures accurate colors in your astrophotos. For night sky shots, cooler tones often bring out the vividness of stars and galaxies. Saturation adjustments can add vibrancy to the colors present in the cosmic landscape.
Advanced Editing Methods and Techniques
In the realm of astrophotography editing, advanced techniques propel your images into the stratosphere of visual excellence. One such technique is Stacking, where multiple images of the same object are aligned and combined to reduce noise and enhance details.
Smartphone cameras revolutionized photography, enabling access to celestial wonders. These devices amplify clarity in celestial objects, revealing intricate details otherwise obscured. Advanced techniques like selective adjustments using masks further enhance cosmic imagery, unlocking hidden marvels.
Addressing Noise and Enhancing Details
Noise often plagues astrophotography due to low light conditions and high ISO settings. To combat this, Noise Reduction techniques come into play. Various software tools offer specific noise reduction features tailored for astrophotos, effectively minimizing graininess while retaining crucial details.
Enhancing details goes hand in hand with addressing noise. Clarity Adjustment is an essential tool that boosts the mid-tone contrast, intensifying the subtle details without compromising the image’s overall quality. Deconvolution is an advanced method used to reverse the blurring effects caused by Earth’s atmosphere or optical systems.
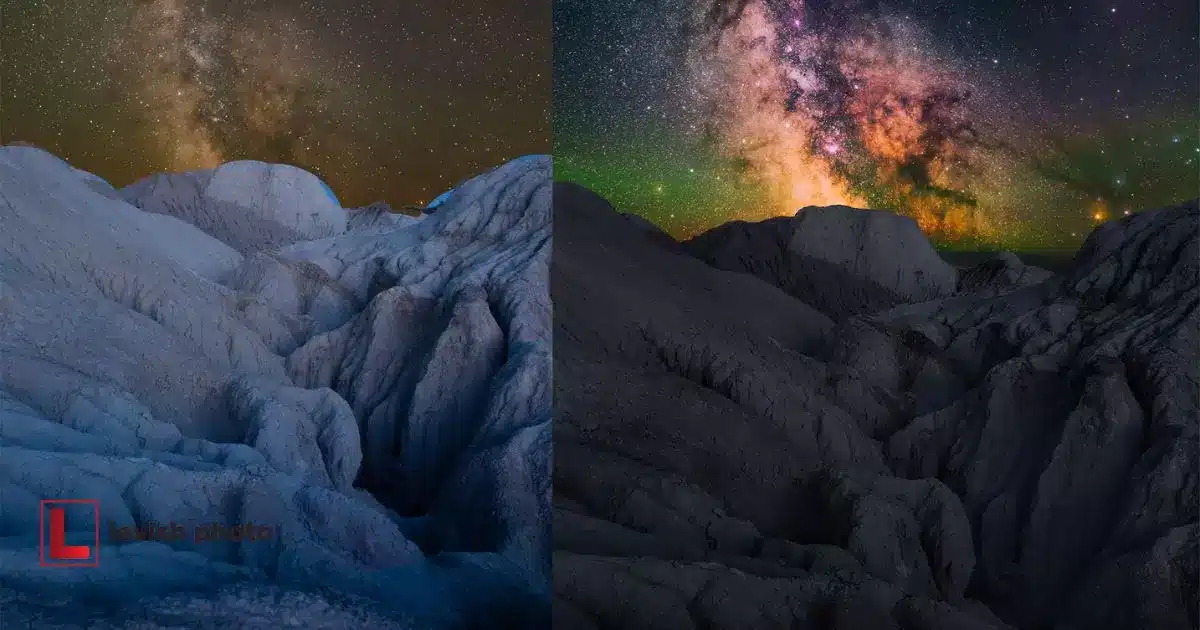
Balancing Color and Contrast in Astrophotos
Achieving the perfect balance of color and contrast in astrophotography brings out the true essence of celestial wonders. Color correction involves adjusting the hues to represent the accurate tones of stars, galaxies, and nebulae. Tools like temperature and tint adjustments help in refining the colors, ensuring they stay faithful to the cosmic reality.
Preserving the authenticity of astrophotography while editing is crucial to maintaining the integrity of the captured scene. It involves a delicate dance between enhancement and accuracy. While editing, it’s essential to retain the genuine essence of the night sky without altering the inherent characteristics of celestial objects.
Finalizing and Showcasing Your Edited Astrophotography
Finalizing edited astrophotography involves several crucial steps beyond just editing. Stacking multiple exposures is a common technique used to extract finer details and reduce noise, resulting in a sharper and clearer image of celestial objects.
Table for Showcasing Techniques
| Technique | Description |
| Stacking | Merging multiple images to enhance details and reduce noise, resulting in a clearer astrophotograph |
| Cropping and Framing | Selecting the optimal composition to highlight the central celestial objects within the frame |
| Adding Metadata | Including details like exposure settings, location, and time to provide context to the image |
| High-Quality Export | Saving the final image in suitable formats while preserving its quality for online or print display |
When it comes to showcasing your edited astrophotography, exporting the final image in high quality is vital. Whether it’s for online display or printing, maintaining the image’s integrity and resolution ensures that viewers experience the full beauty of the cosmic spectacle you’ve captured.
FAQS
What software is best for balancing color and contrast in astrophotos?
Software like Adobe Photoshop or Lightroom offers robust tools for adjusting color balance and contrast to bring out the vividness of celestial objects.
Is it necessary to stack multiple exposures when finalizing astrophotography edits?
Stacking multiple exposures can significantly enhance details and reduce noise, resulting in a clearer and more refined astrophotograph.
What’s the significance of adding metadata to edited astrophotography?
Including metadata such as exposure settings, location, and time provides crucial context and adds value to your astrophotographs.
How do I ensure my final edited astrophotography maintains high quality for display?
Export your final images in suitable formats while maintaining high resolution to ensure optimal quality for both online and print displays.
Conclusion
Mastering the art of editing astrophotography opens a window to capture the enchanting beauty of the cosmos. With dedicated software and techniques, you can enhance details, balance colors, and bring out the intricate wonders hidden within celestial scenes.
In the journey of astrophotography editing, each adjustment contributes to revealing the mesmerizing allure of stars, galaxies, and nebulae. As you finalize and showcase your edited astrophotography, it’s not just about refining images but also sharing the awe-inspiring beauty of the universe captured through your lens.